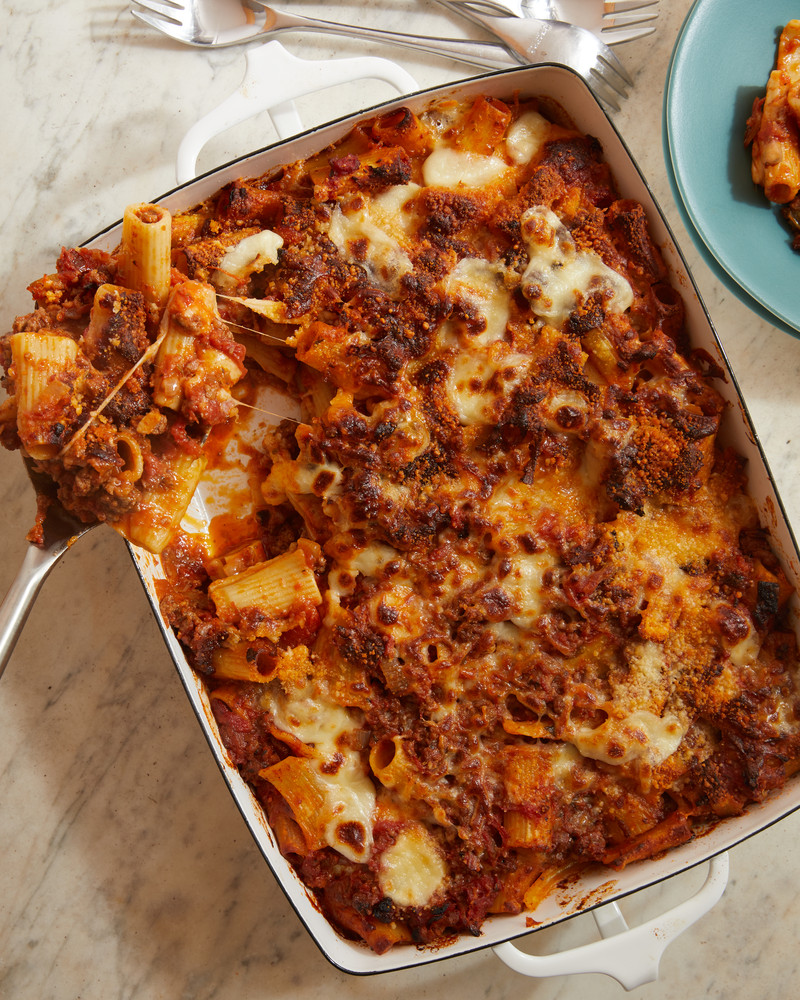
Is there anything more comforting than a dish of tender baked noodles, savory beef and gooey cheese coming out of the oven? This baked rigatoni is easier to assemble than lasagna, packed with just as much flavor and perfect for stashing in the freezer as a gift to your future self. Here’s how to do it.
Ziti vs. rigatoni
Rigatoni is a short pasta that’s larger and wider than ziti. Ziti has a slender, smooth shape, while rigatoni’s tube is lined with ridges to trap thick, meaty sauces. When it comes to this baked pasta dish — packed with ground beef, a rich tomato sauce, and melted cheese — there’s no question that rigatoni is the best choice. If you’ve got ziti on hand, opt for our all-star baked ziti recipe instead.
The best beef for baked rigatoni
Lean ground beef, sometimes labeled 90/10 or sirloin, is the best choice for this dish (and really any baked casserole), providing rich beefy flavor without the excess fat that would otherwise need to be drained off after browning. Bulk Italian sausage and ground turkey can also be substituted, but avoid ground turkey breast, as it is too lean and can easily turn tough and mealy.
How to get gooey pockets of cheese
After browning the beef, you’ll stir in the cooked pasta so that the beef is evenly distributed among and inside the noodles. The sauce and shredded mozzarella come next. Some of the cheese will melt, but keep stirring and the mozzarella will distribute evenly throughout the mixture without disappearing completely. Fold in the mozzarella cubes last, which helps keep them intact; these larger pieces of mozzarella will melt into gooey puddles of cheese in the oven.
Assembling and freezing rigatoni
If you’re meal prepping this casserole, assemble it in a metal or disposable foil baking dish, let the unbaked casserole cool, then wrap tightly in aluminum foil and freeze for up to two months. When you’re ready to bake, you can do so directly from frozen, or thaw it overnight in the refrigerator to reduce the cook time. Either way, bake uncovered for the last 15 minutes so the cheese can brown.
Cheesy Baked Rigatoni with Beef
Serves 8 to 10
1 medium yellow onion
4 cloves garlic
12 ounces low-moisture mozzarella cheese, divided
3/4 ounce Parmesan cheese, grated (about 2/3 cup grated on a Microplane or 1/4 cup store-bought)
2 tablespoons olive oil
1 pound lean ground beef
1 teaspoon kosher salt, plus more for cooking the pasta
1 teaspoon dried Italian seasoning
1/2 teaspoon freshly ground black pepper
2 (24-ounce) jars marinara or pasta sauce (about 6 cups total)
1 pound dried rigatoni pasta
Chopped fresh basil leaves, for serving (optional)
1. Arrange a rack in the middle of the oven and heat the oven to 350 F.
2. Bring a large pot of heavily salted water to a boil over high heat. Meanwhile, prepare the aromatics and cheese and cook the beef.
3. Dice 1 medium yellow onion (about 1 cup). Mince 4 garlic cloves. Shred 8 ounces of the mozzarella cheese (about 2 cups), then cut the remaining 4 ounces into 1/2-inch cubes (about 1 cup). Grate 3/4 ounce Parmesan cheese (about 2/3 cup grated on a Microplane or 1/4 cup store-bought).
4. Heat 2 tablespoons olive oil in a large pot or Dutch oven over medium-high heat until shimmering. Add the onion and cook until soft and lightly browned, 5 to 6 minutes. Add the garlic and cook until fragrant, 30 seconds to 1 minute. Add 1 pound ground beef, 1 teaspoon kosher salt, 1 teaspoon dried Italian seasoning, 1/2 teaspoon black pepper, and cook until the beef is browned and no longer pink, about 8 minutes. Remove the pan from the heat.
5. Add 1 pound dry rigatoni pasta to the boiling water and cook pasta according to package directions until al dente, 10 to 12 minutes.
6. Drain the pasta in a colander.
7. Add the pasta to the pot of beef and stir to combine.
8. Add 2 jars pasta sauce and stir to combine. Add 1 cup of the shredded mozzarella and stir to combine. Add the cubed mozzarella and fold it in.
9. Transfer the pasta mixture to a 9-by-13-inch baking dish, or divide between two (8-inch) baking dishes or disposable foil trays. (Use a metal or disposable baking dish if you’re planning to freeze this.) Sprinkle with the grated Parmesan and remaining 1 cup mozzarella.
10. Bake until the edges are bubbling and the cheese on top is completely melted and browned in spots, about 30 minutes.
11. Remove the baking dish to a wire rack and let cool for 5 to 10 minutes before serving. Top with chopped fresh basil leaves, if using.
Recipe notes
- The unbaked casserole can be prepared up to two days in advance, covered with aluminum foil and refrigerated. When ready to bake, remove from the refrigerator while the oven heats. Uncover and add 5 to 10 minutes additional baking time.
- Refrigerate leftovers in an airtight container for up to five days.
- Ground turkey or Italian sausage can be substituted for the ground beef.
- If you plan to bake the casserole straight from the freezer, assemble it in a metal or disposable foil baking dish. Let the unbaked casserole cool completely in the pan, then wrap tightly in aluminum foil and freeze for up to two months.
- Bake the casserole, still wrapped in the foil, at 350 F until heated through and an instant-read thermometer registers 165 F in the center. For a frozen casserole, this will take 1 hour 45 minutes to 2 hours. For a thawed casserole (thaw overnight in the refrigerator), this will take about 1 hour. Whether baking from frozen or thawed, bake uncovered for the last 15 minutes so the cheese can brown.
This article is written by Patty Catalano, The Kitchn.com from The Kitchn and was legally licensed via the Tribune Content Agency through the Industry Dive publisher network. Please direct all licensing questions to legal@industrydive.com.