Before we get into the subject of how to cook Thai glutinous rice, aka sticky rice, let’s talk first about what kind of rice it actually is. Because it’s understandably confusing! The term “sticky rice” is used to refer to so many types of rice—from different types of short grain Japanese, Chinese, or Korean rice to medium grain Calrose and the various types of short grain rice used in Italian and Spanish cuisines. Things get so confusing that nearly every time I write about the traditional way the Thai and Lao people cook their sticky rice, I get questions from people wanting to know why you can’t just throw the blessed rice into a pot and cook it with water. After all, they ask, isn’t that how the Japanese cook their sushi “sticky” rice?
How to Buy the Right Sticky Rice
In the context of Thai cooking, “sticky rice” refers to long grain glutinous rice that is consumed most commonly in the north and northeastern parts of the country. The opaque white rice is usually marketed as Thai sweet or glutinous rice in the United States. Look for a Thai brand, such as Three Horses or Rose. When in doubt, look for the word “Thai,” “sweet rice,” “glutinous rice,” “Thailand,” or ข้าวเหนียว on the package. The more of these components you see together on the package, the more likely you have the right type of rice. Once you have the right type of rice, everything from this point on is easy.
Three Ways to Make Sticky Rice
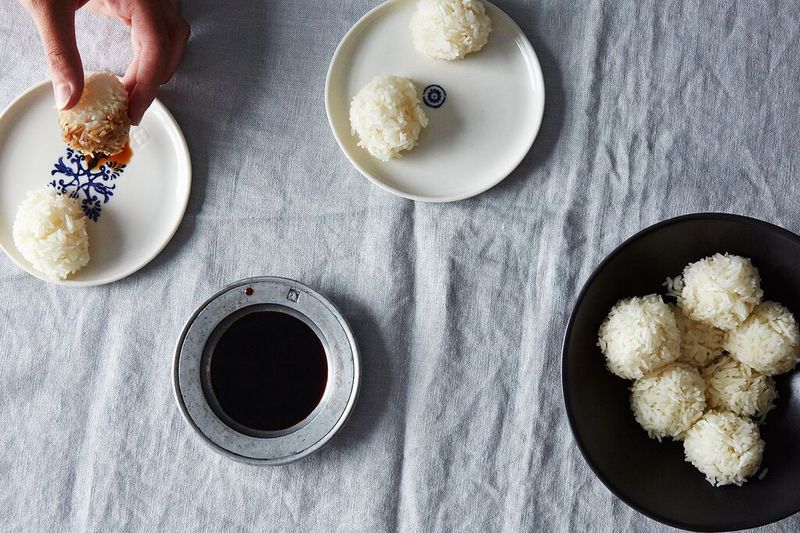
The Thai, especially northerners and northeasterners as mentioned above, eat glutinous rice so much and so routinely that a tool has been devised exclusively to help them cook this type of rice just how they like it—with grains that hold their shape, not too hard or dry and, by all means, not too wet or sticky. When cooked this way, the rice lends itself well to be eaten with the hand, as is traditionally done. To eat cooked sticky rice, the Thai traditionally pinch off a walnut-sized chunk and knead it lightly with their fingers to form an oblong ball that they use to dip into a savory relish or scoop up chunkier foods.
1. The Traditional Way: a Bamboo Basket
The previously-mentioned uni-tasking device is a combo of a tall aluminum pot with narrow opening (a spittoon lookalike) and a conical bamboo basket. You fill the pot with water and put the soaked and drained sticky rice in the basket. Then you put the basket on the pot, making sure the bottom of the basket does not touch the water, and bring the water to a boil. As the water boils, it will release steam that rises up and cooks the rice in the basket, causing it to soften and become sticky. You flip the rice once or twice during the cooking as necessary. Soon you end up with a basket of warm sticky rice ready to be eaten or used in a recipe. The problem with this traditional tool is that it is a uni-tasker that takes up quite a bit of space and is pretty hard to clean. The good news is there are other options.
2. For a Few People: use a Splatter Guard
If you’re anything like me and cook only a small amount of sticky rice a few times a month or less, you can opt for a non-traditional method of steaming the rice on a splatter guard set over a saucepan of boiling water. The splatter guard’s fine mesh keeps the rice from falling through while allowing the steam to rise up and penetrate the rice mound; it’s also very easy to clean since the rice doesn’t stick to it the way it does to the bamboo basket. Head here to learn more about this method.

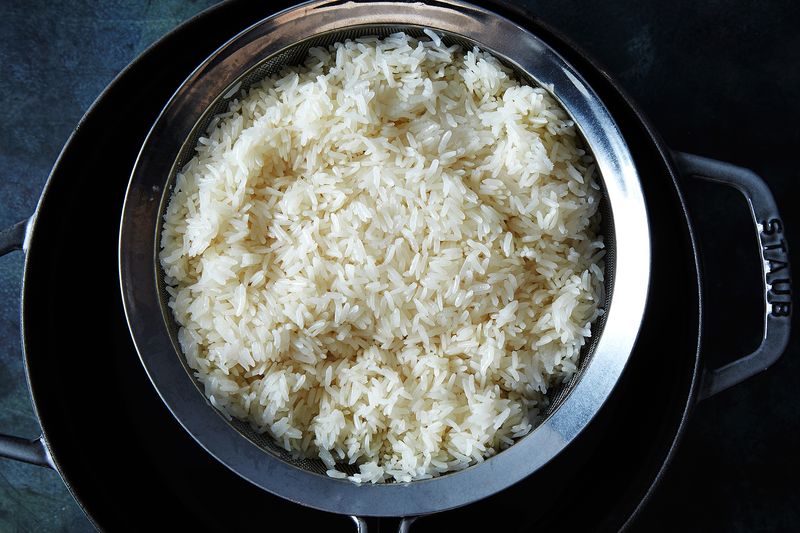
3. The Best Way: with a Colander
What if you, say, have a party and want to cook more than a couple cups of rice? I recommend another method, which is to steam the rice in a colander set over a pot of boiling water. Here’s why it’s a winner:
- Because of its shape, a colander can accommodate a larger amount of rice than a splatter guard would.
- Its bottom sinks into the pot instead of sitting on its rim (the way the splatter guard does), so the distance between the rice and the boiling water is greatly reduced, which means the rice cooks faster.
- It doesn’t require that you cover the rice with a domed lid because the rice doesn’t form a mound on a flat surface but rather sits in the curvature of the colander. This means you can use any type of lid, flat or domed, to cover the rice.
- And, you probably have a colander right now.
The tools you'll need:
- A colander: Any type of metal colander you have will work, but the type that works best, in my experience, is an unfooted, perforated, plain stainless steel colander with holes smaller than the size of the rice kernels. A mesh colander works well, too, but is more difficult to clean as the cooked rice tends to clog up the mesh.
- A pot: You want to pair the colander with a pot whose height is at least twice the depth of the colander. A pot this tall can hold enough water to last the entire duration of the cooking without you having to refill it with more water and boil the water again mid-procedure.
- A cover: Lastly, you need a lid with which to cover the rice. If the pot you’re using comes with a lid, it should work nicely. If not, anything heatproof that can sit on top of the colander without touching the rice—even foil—will do.
How to Make Sticky Rice in a Colander:
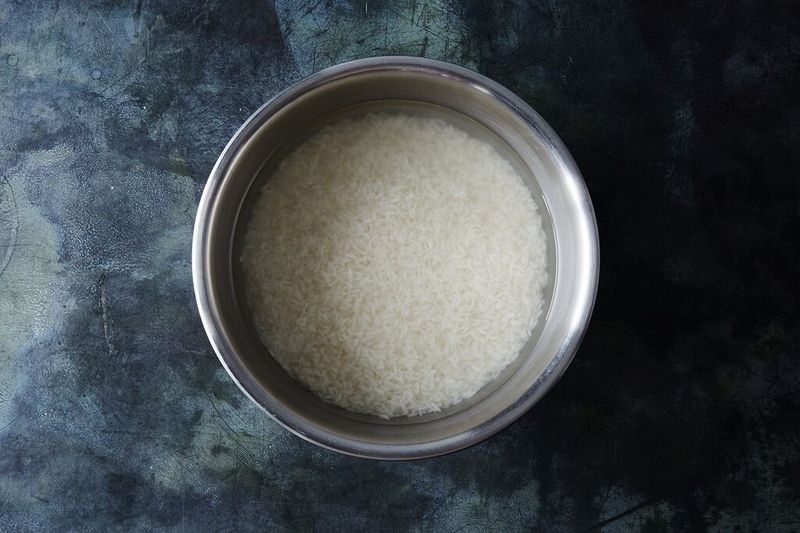
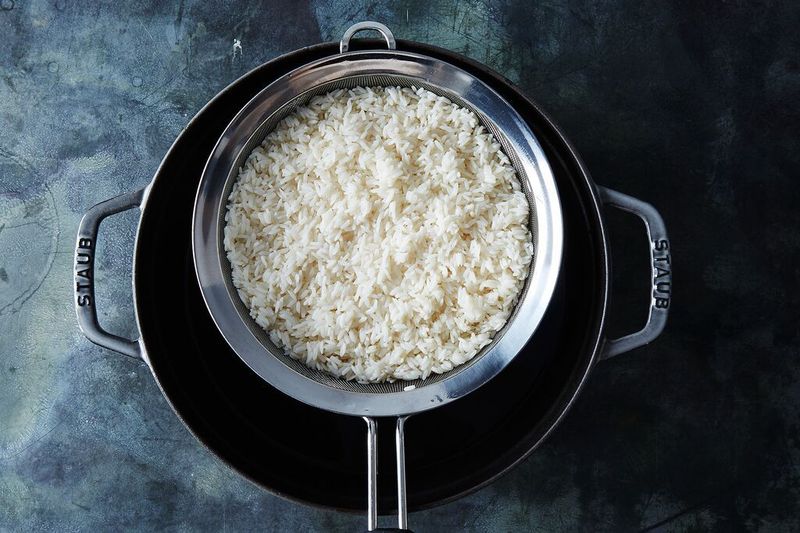
To get approximately 6 cups of sticky rice, soak 4 cups raw sticky rice in room-temperature water for 4 to 8 hours. Rinse it gently, being careful not to break the grains, until the water runs clear; drain the rice through the colander in which you will cook it.
Set the colander on top of a pot, observing how far down the bottom of the colander drops into the pot. Then fill the pot with water, making sure the level of the water is about 2 to 3 inches below the bottom of the colander. Cover the rice with a lid and set the pot over high heat. When the water boils, lower the heat to medium-high.
Steam, covered and undisturbed, for 15 minutes. With a large rubber spatula, scoop up the whole batch of rice (which, at this point, should form a sticky mass that’s easy to handle) and flip it in one go. Replace the lid, and continue to steam for another 15 minutes. Check for doneness. All the kernels should be soft, sticky, and somewhat translucent with no parts that still look opaque white.
Eat the rice while it’s still warm. To keep the rice warm during the meal, keep it covered inside the colander and keep the water steaming on the lowest setting of the stove.
Photos by Bobbi Lin
This article was written by Leela Punyaratabandhu from Food52 and was legally licensed through the NewsCred publisher network. Please direct all licensing questions to legal@newscred.com.