Brisket is a terrific way to feed a crowd, but can be a daunting cut of meat to face the first time you cook it. The meat itself is large and unwieldy, inconveniently alternately thick and thin in parts, alternately fabulously fatty and super lean. It is no wonder that the two best ways to prepare this cut are smoking and braising, both of which take advantage of low and slow cooking to render the fat, melt the collagen, and tenderize the whole cut from end to end.
Beef brisket is one of the iconic meats used in barbecue; award-winning chef and pitmaster Matt Horn (a 2021 Best New Chef) explained the art of how to smoke a brisket. But if you are not using a smoker, an oven is your best bet for cooking brisket. Braising is a flexible and forgiving way to prepare a large piece of meat, ideal for even a less-confident cook hosting a holiday meal. Here’s how to get started.
What is brisket?
Brisket comes in three cuts: whole, point and flat. A whole brisket consists of both the point and flat sections in one giant piece, and generally runs about ten to 14 pounds. Whole briskets tend to be better for smoking due to the size. The point cut of the brisket is the thicker half of the brisket, and is well-marbled, often with a thick fat cap. This makes it great for braising; the meat will be unctuous and slightly sticky, similar to a short rib in texture when cooked. The flat is the thinner end of the brisket, and while it will also have a nice fat cap on the top, the meat itself is much less marbled and denser protein. It will provide slices that hold together well and will be more like a pot roast in texture. Lean corned beef and pastrami are made with the flat cut of the brisket. Both the point and flat cuts work well for holiday roast. The point cut will render more fat and leave less actual meat, so plan on about three quarters of a pound per person of pre-cooked weight if you choose this cut. The flat will have more meat after the cook, so you can plan on half a pound per person.
How to prep your brisket
Brisket needs to chill overnight before slicing, so plan to cook it one to three days before you want to serve. You’ll be rewarded with meat that has benefited from giving the flavors time to meld.
For starters, you will want to trim the fat cap on the point cut to around a quarter inch thickness. If you are using the flat, you’ll want slightly more fat on the surface to baste the meat, so trim to half an inch. Then, it’s time to brine it, to season the interior meat. We recommend a dry brine. Give both sides of your brisket a generous layer of kosher salt, then put it into a large zip-top bag and refrigerate it overnight, flipping it every few hours or so, and massaging the meat in the bag.
How to cook brisket in the oven
Take your meat out of the fridge about two hours before you want to start cooking, so the chill dissipates and it is easier to sear. Then, use a large cast-iron skillet or griddle to brown the meat on all sides. Getting deep caramelization on the brisket before braising it adds a rich flavor and deeper color to your final product.
Add vegetables to serve as aromatics in the braising liquid. We love carrots, celery, onion, leek, garlic, shallot, ginger, fennel, and parsnips for this purpose. Rough-chop your vegetables and layer them on the bottom of a deep roasting pan. Add fresh or dried herbs; we like thyme, bay leaf, rosemary, and savory. If you want some sweetness in your final gravy, you can also add tomato paste, chili sauce, or even hoisin sauce at this point; just stir it into the vegetables.
Place the meat on top of the vegetables, and then pour in the braising liquids. We like to combine a couple of different types of liquid for the best flavor and texture. You want something a little acidic; wine, beer, hard cider, sake or soju add terrific flavor to your braising liquid, as will apple cider, pomegranate juice, or orange or tangerine juice. You can use these liquids for up to a quarter of your total braising liquid. The rest should be more neutral, like water, or chicken or beef stock. The total liquid should come up about three quarters of the way up the side of the meat, leaving the top portion of the meat poking out. Cover your roasting pan tightly with foil, and put it in the oven. Most brisket recipes call for a long, slow braise at a low temperature, which yields tender meat that easily breaks apart when poked with a fork.
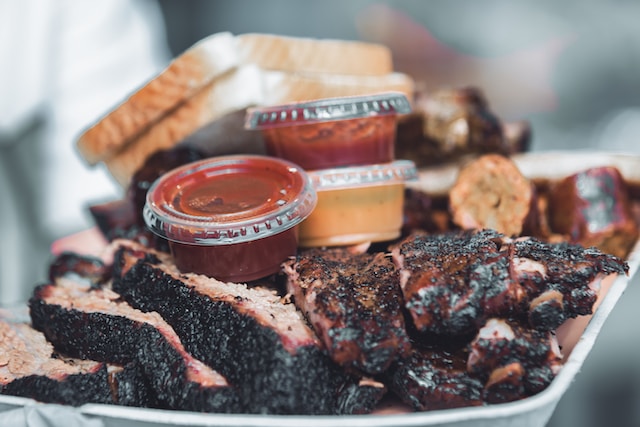
Photo by Luis Santoyo
How to finish your brisket
After your brisket has finished cooking, letting it cool to room temperature in the braising liquid is essential to keeping it tender and moist; if you remove it from the liquid it will dry out as it rests. Let it sit out for about two hours, then transfer the meat to a pan or container, wrap it tightly with plastic wrap or foil and refrigerate it overnight. Then, it’s time to make the gravy. Remove any springs of herbs or bay leaves from the roasting pan and discard them. Transfer the vegetables to a blender with a slotted spoon. De-fat the pan juices and add the juices to the blender. Blend everything until smooth, then taste and adjust seasonings to your taste with more salt or a splash of wine. Transfer the gravy to a container and refrigerate it overnight.
The next day, slice the meat across the grain into half-inch-thick slices, and shingle the slices in a large roasting pan. Pour the prepared gravy over the meat, being sure to cover the meat with the sauce. Cover the pan with foil and reheat the brisket in a warm (350°F) oven until the gravy is bubbling around the edges, about 35 to 45 minutes, then reduce the heat to 200°F to hold the brisket warm until you are ready to serve. It’s almost impossible to overcook brisket, but the texture will be ideal if you serve it within 90 minutes of reheating it.
This article was written by Stacey Ballis from Food & Wine and was legally licensed through the DiveMarketplace by Industry Dive. Please direct all licensing questions to legal@industrydive.com.