When I was 15, my parents decided my free time would be better spent at a job than with my high school boyfriend. (In retrospect, they were definitely right.) So for the next three years, I worked at a sap house in my small hometown in upstate New York, helping out around the store after school and waiting tables during weekend pancake breakfasts.
It's no surprise that anything and everything maple holds a special place in my heart. (Let's be clear: We’re talking pure maple syrup, not that fake stuff. Us folks here in maple country tend to take our syrup pretty seriously.) And of all the things you can do with maple syrup, turning it into maple cream is perhaps my most favorite.
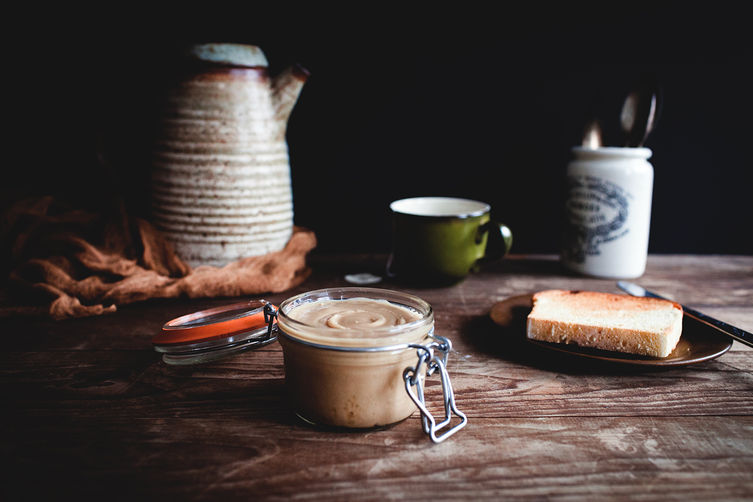
If you’ve never had maple cream (a.k.a. maple butter), you’re missing out on maple in its most decadent, delicious form. To make maple cream, you simply heat maple syrup to the cusp of soft ball stage, cool it down, and then slowly stir it until the sugars crystallize to form a light, spreadable cream. It’s wonderful on toast, mixed into frosting, or simply eaten right off a spoon.
Makes approximately 3 1/2 cups
1 quart 100% pure maple syrup (Grade A Light Amber is ideal)
1/4 teaspoon cream (to keep it dairy-free, use oil instead)
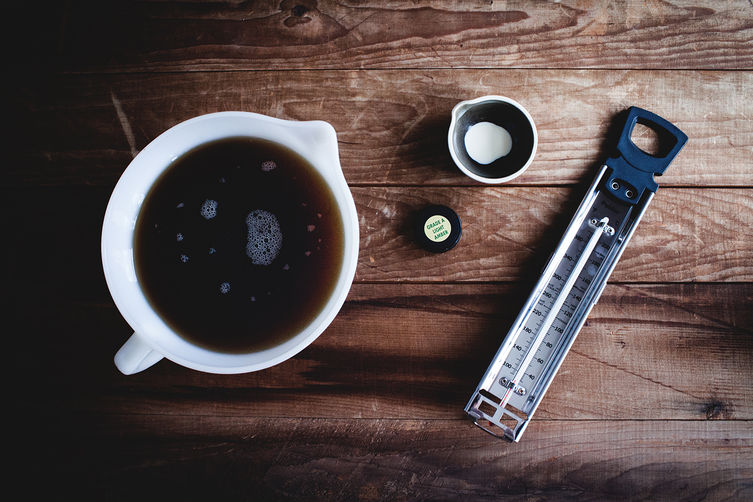
First, double-check the temperature at which water boils with the thermometer you’ll be using. If it boils at 212° F, then you can follow the recipe as is and heat the syrup to 235° F.
If it boils at a higher or lower temperature than 212° F, add or subtract that temperature difference to or from 235° F to determine your target final temperature for the syrup. (So, for example, if the water boils at 210° F, the final syrup temperature would be 233° F.)
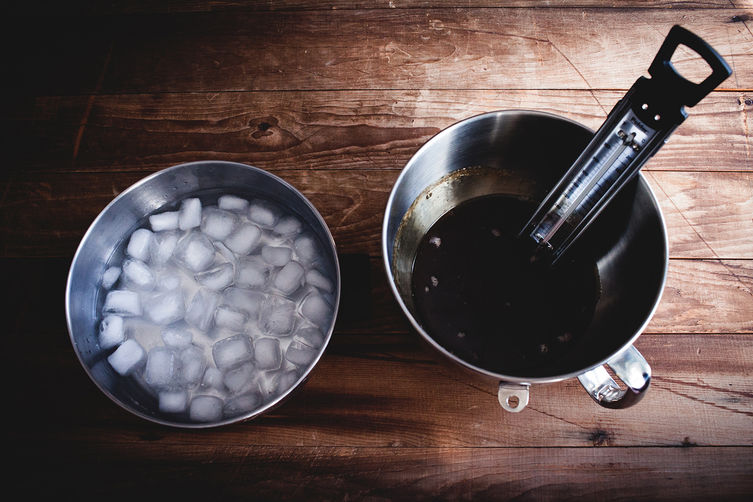
Prepare an ice bath.
Combine the syrup and cream in a heavy saucepan with high sides. (The syrup will bubble and rise as it boils, so choose a pan that is at least double the volume of the liquid to avoid boiling over.) Clip a thermometer to the side of the pan so that it is submerged in the syrup, but not touching the bottom.
Without stirring, heat the syrup to 235° F. Once it reaches 235° F, immediately remove it from the heat. If you will be stirring the syrup by hand, you can leave it in the pan and place the pan directly in the ice bath. If you will be using a stand mixer, pour the syrup into the mixing bowl (provided it’s stainless steel bowl and not glass) and place it in the ice bath.
Stick the entire thing in the fridge until the syrup has cooled to approximately 40 to 45° F.
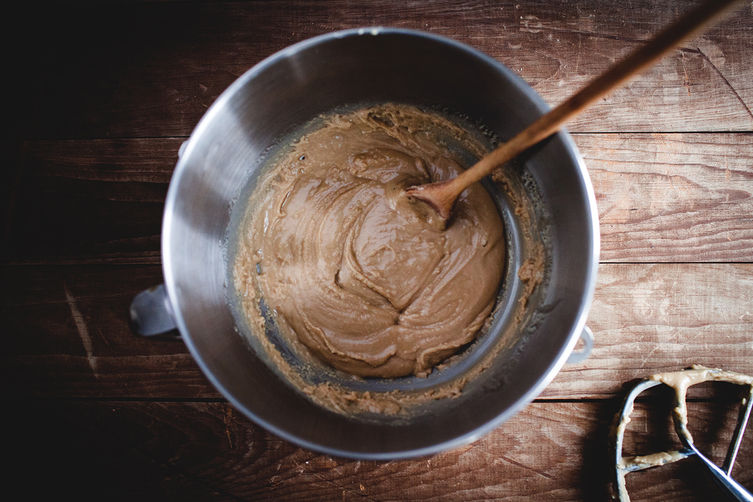
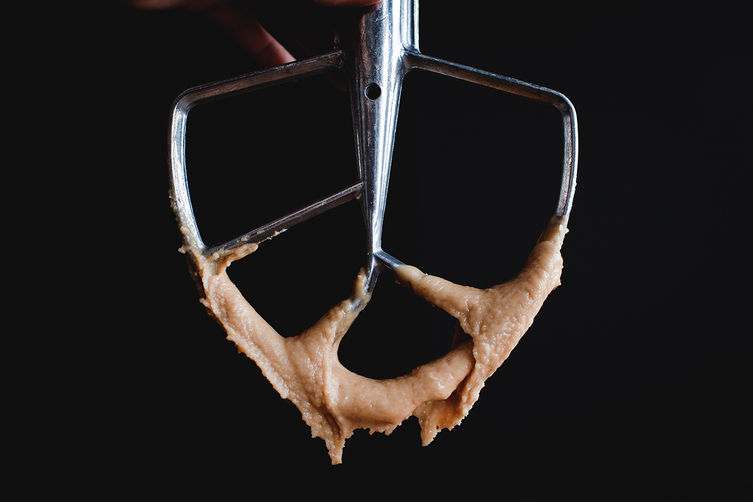
Once the syrup has cooled, remove it from the fridge and from the ice bath. Allow it to warm up a bit, to approximately 55 to 60° F. If you’re using a stand mixer, affix the paddle attachment and stir the syrup on the lowest setting. If you’re stirring by hand, stir the syrup slowly -- don’t try to whip it quickly. And invite some friends over to help -- your arms will thank you.
Stir until the syrup begins to thicken, lightens in color, and takes on a creamy consistency that somewhat holds its shape when stirred.

Store the cream in the fridge for up to 6 months. It is normal for some syrup to separate and rise to the top over time. If this happens, just give it a good stir to reincorporate. (The cream can also be safely canned and stored at room temperature and then refrigerated after opening.)
See the full recipe (and save and print it) here.
Photos by Carey Nershi
This article was written by Carey Nershi from Food52 and was legally licensed through the NewsCred publisher network. Please direct all licensing questions to legal@newscred.com.