I find that the word "quiche" is usually said one of two ways. The first is like a verbal eye roll—“Oh…quiche…”—and probably refers to a seriously bad quiche experience—one made up of spongy custard, soggy crust, and/or too few fillings.

The second sounds a little more like someone crawling into a warm bed after an incredibly long day—“Oh! …quiche!” —such satisfied sighs can only come from someone who has had an excellent quiche encounter: decadently rich, smooth custard dotted with plenty of tasty fillings, all encased in a flaky, crisp pastry crust.
That’s the kind of quiche I want to talk about. So if you’re the first kind of quiche-sayer, try to block out the bad memories, and let’s get you to a way more delicious place in 10 steps.
- Ready your dough.
- Preheat your oven.
- Par-bake.
- Get extra help.
- Cool the par-baked crust.
- Add the fillings—but not the custard (yet).
- Okay, now add the custard.
- Bake.
- Cool (or don't!).
- Mix it up next time.
1. Ready your dough.
First up, your pie dough. Whatever recipe you use, you’re going to want your dough on the mealy side. I know that word doesn’t sound super appetizing, but in the pie world, it’s the description for dough that has had the butter mixed in a bit more fully. The butter is cut into the flour until it resembles the size of peas (whereas for flaky dough, the butter stays larger—closer to the size of walnut halves).
While I love a flaky crust, mealy crusts are better for custard pies (either sweet or savory, like quiche). Don’t worry, the dough will still be tender and pretty flaky, and it will hold up better to the high moisture filling.
2. Preheat your oven.
It's a step so important I must state the obvious: Before you even start rolling out your dough, preheat the oven. Quiche bake at lower temperatures (more on that later), but the crust needs to go into a really hot oven for par-baking, so crank it up to 425° F.
If you’ve got one, put a pizza or baking stone on the bottom rack, too (this will help ensure the bottom of your crust is getting even more golden and crisp, which never hurts).
3. Par-bake.
Par-baking is so important for pies with high moisture fillings—whether you’re talking cream pies, chess pies, or your favorite quiche. Par-baking allows the base and sides of the crust to set, which means they’ll absorb less moisture from the filling in the oven. We’re talking about the difference between a crisp, golden bottom crust and a soggy, semi-translucent bottom crust here, so it’s worth it, I swear.
For lots of info on par-baking, check out this article.
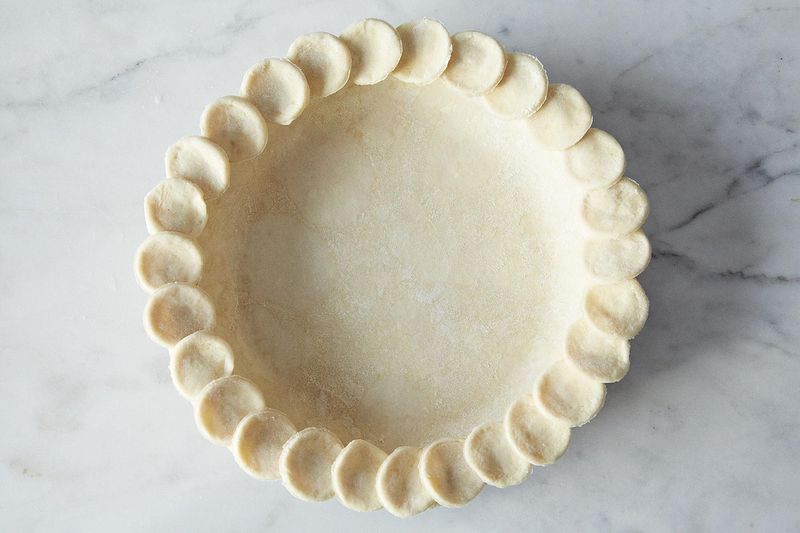
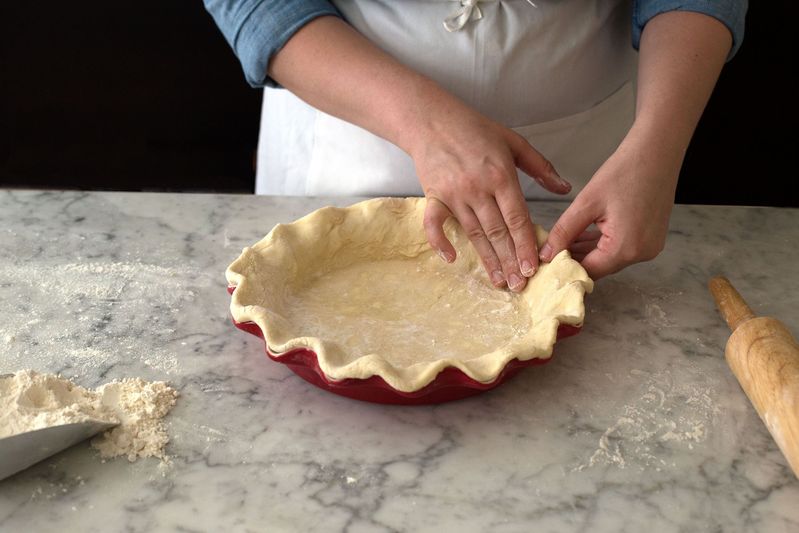
You’ll want to roll out your dough, transfer it to your pie plate, crimp your edges, dock it all over with a fork, and chill the heck out of it. I toss mine in the freezer while I get the filling ready.
Then place a piece of parchment paper inside the pie plate and fill it with pie weights. Bake the crust (on the pizza stone, if you’re using) until it begins to turn lightly golden brown at the edges (10 to 13 minutes). Remove the parchment and the pie weights: You’ll see the crust where the paper was touching looks a little bit wet. Return the pie plate to the oven (sans weights) and bake for 1 to 2 more minutes, until the base looks dry. The crust should stay put, but if it puffs up anywhere, don’t panic! Just poke the affected area with a fork and it should deflate again.
When your crust is done par-baking, it should look dry all over and just barely beginning to turn golden brown—the rest of the browning will happen once the filling is added.
4. Extra help.
While par-baking should help your crust stay crisp, you can always take a few extra measures too.
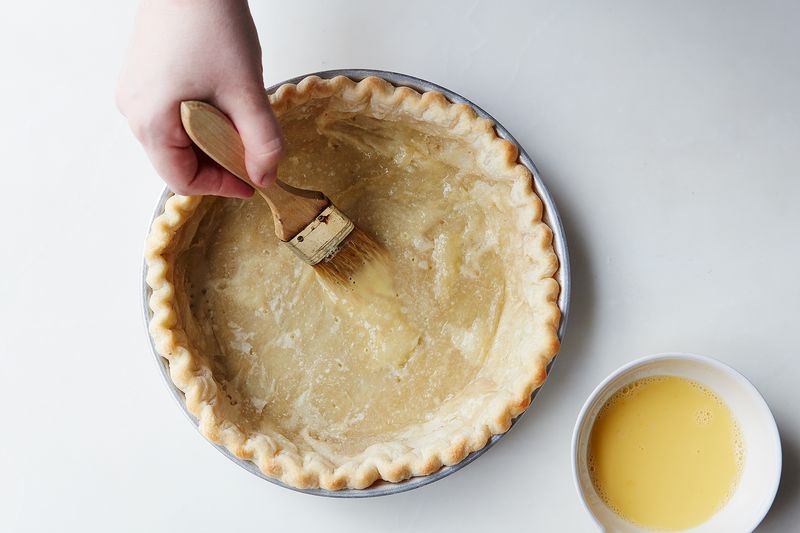
Photo by Mark Weinberg
- Once I’m done par-baking, I like to brush the base of the crust with egg wash. If the pie is hot from the oven, you may not even need to return it to the oven—if it’s cooled a bit, throw it back in the oven for 15 to 30 seconds, just until that egg layer is “cooked.” Just like egg washing the tops of pastries or breads, the egg wash will make a seal on the surface of the dough, protecting your carefully-tended crust from unwanted moisture.
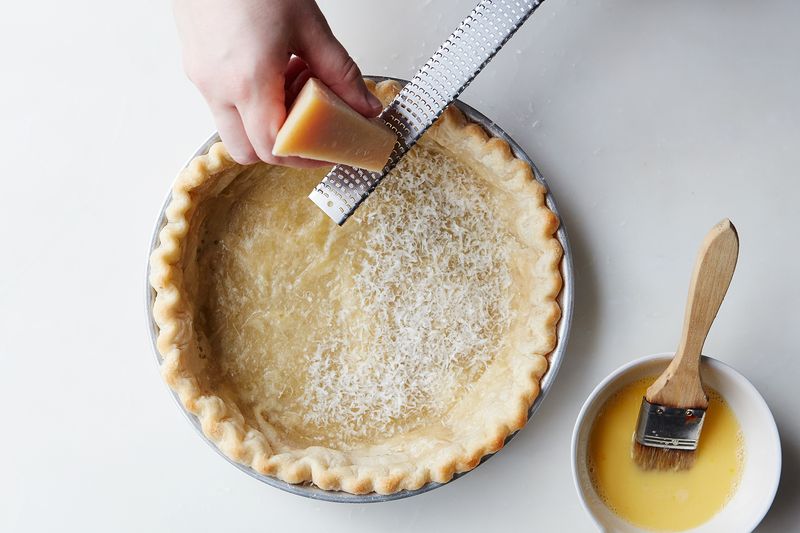
Photo by Mark Weinberg
- And since we’re talking quiche here, I enlist a little more help from grated cheese. I like to add a layer of grated cheese (hard cheeses are especially great here, but you can use a softer cheese if you prefer) to the base of the crust, and return the pie plate to the oven once more, this time for about 2 minutes—just enough to brown or melt your cheese. This creates another barrier between the crust and the custard—plus it’s really yummy (cheesy pie crust party!).
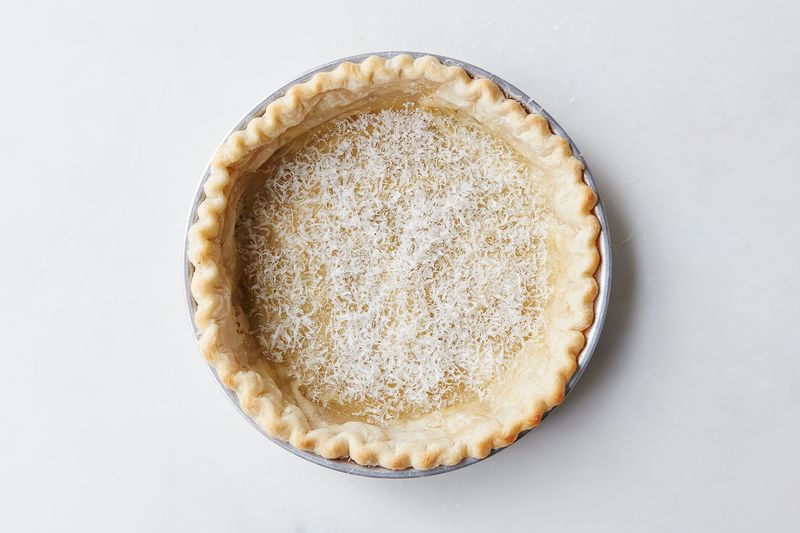
Photo by Mark Weinberg
5. Cool the par-baked crust.
Whether you do a simple par-bake or you enlist the help of egg wash and/or cheese, let your crust cool completely before you add the filling. And while you’re at it, turn your oven temperature down. Most quiche recipes will call for it to be baked between 325 to 375°F that so the custard can slowly coagulate without turning spongy or drying out. If you’re using a pizza stone, leave it in.
6. Add the fillings (but not the custard—yet).
I start by adding my fillings to the crust. Why? For one, it’s easy to make sure they’re in an even layer. And I like a lot of fillings, so it also helps me make sure I’ve got enough in before I add anything else to it. I add fillings until they come up to just under the edge of the pie crust (by 1/4-inch or so—but no need to be precise).
And for another reason, if you want to do any kind of fancy top, this is how you get there. Some ingredients might float on the surface of your custard, but I find it’s better to just give yourself a surface to build an arrangement on. Arrange an even layer of fillings into the crust, then arrange your final ingredients on top. We’re talking about asparagus designs, pretty heirloom tomato slices, or anything else you want to be perfect on the top of your quiche. (Or, you can just dump your fillings in—whatever floats your boat.)
Note: If your recipe calls for fillings to be pre-cooked in any way, make sure you let them cool completely before adding them to the quiche—hot fillings can cause the custard to begin cooking (and unevenly so!) upon contact.
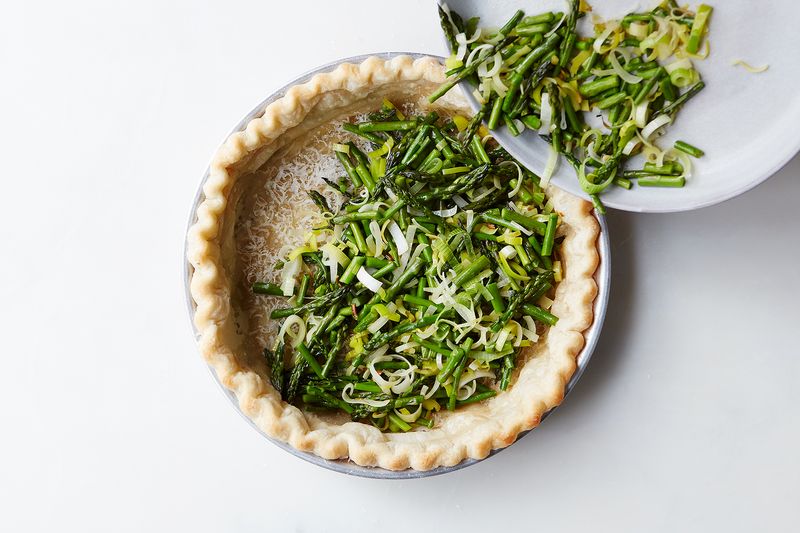
Photo by Mark Weinberg
7. Add the custard.
After the fillings are in, pour the custard over them. I like my custard to be pretty rich (hello, heavy cream), which is why I compensate with plenty of fillings.
Whisk your custard well to combine before you add it, but not so vigorously you make lots of air bubbles—those tend to float on the surface and get stuck there during baking.
If you’re feeling more cheese, add it on top at this point.
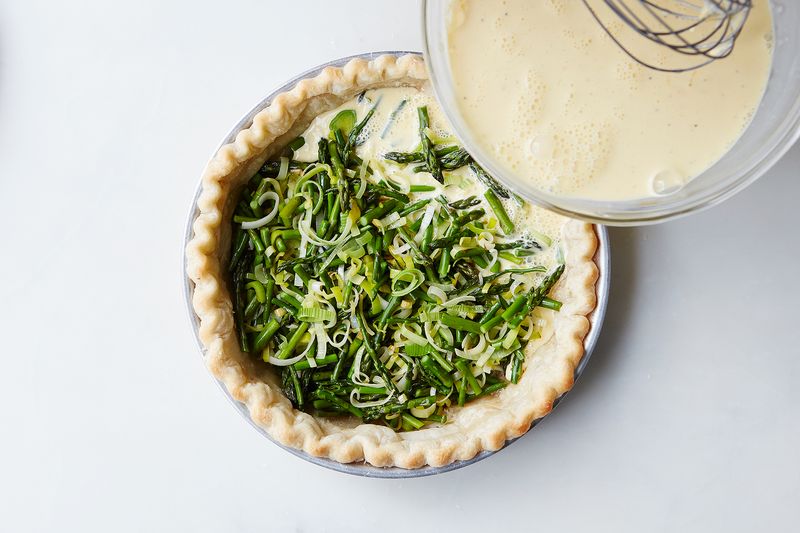
Photo by Mark Weinberg
8. Bake.
Baking times for quiche will vary drastically based on the pie plate, the recipe, and the baking temp—but there’s a few visual indicators to guide you.
- First of all, you’ll want your crust to be very golden brown, and evenly so.
- Next, the fillings: Any visible fillings should be tender and browned, if applicable.
- Finally, the custard: It should look set around the edges of quiche, but it should have a slight jiggle in the center when you move the pie plate. Think Jell-O: a little wiggle, but still sturdy. If, when you move the pie plate, it looks liquid, keep on baking. Baking your quiche properly will mean the custard is silky and smooth, instead of rubbery or spongy. No contest there.
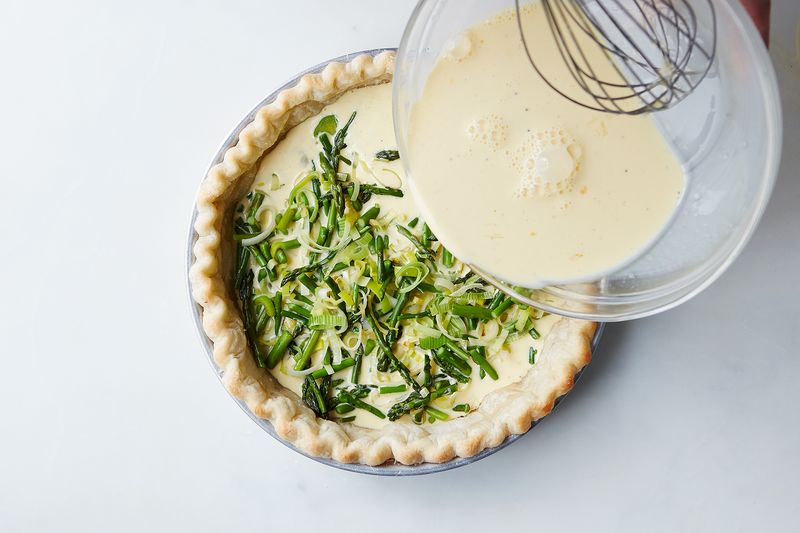
Photo by Mark Weinberg
9. Cool… or don’t.
I’m a fan of quiche lots of ways—sometimes, warm straight from the oven is so good. The custard just melts in your mouth and the crust is extra buttery. But I more often eat quiche at room temperature, or cold.
If you're cooling the quiche, do so at room temperature—don’t try to rush it in the fridge. This can cause evaporation and unwanted moisture buildup, and can (sometimes) cause the filling to pull away from the crust.
10. Mix it up.
There’s a zillion ways to make quiche (and I’m dying to hear your best combinations– leave them in the comments!) – but here are some of my favorites:
- Asparagus, leek, and pecorino (recipe included below!)
- Sausage, potato, and red onion (and Manchego, if you’ve got it)
- Tomato and kale—with goat cheese!
- Zucchini and yellow squash with Brie
- Bacon, cheddar, and arugula
- Mushrooms (brown them first!) and Gruyère
- Caramelized onions + anything, really
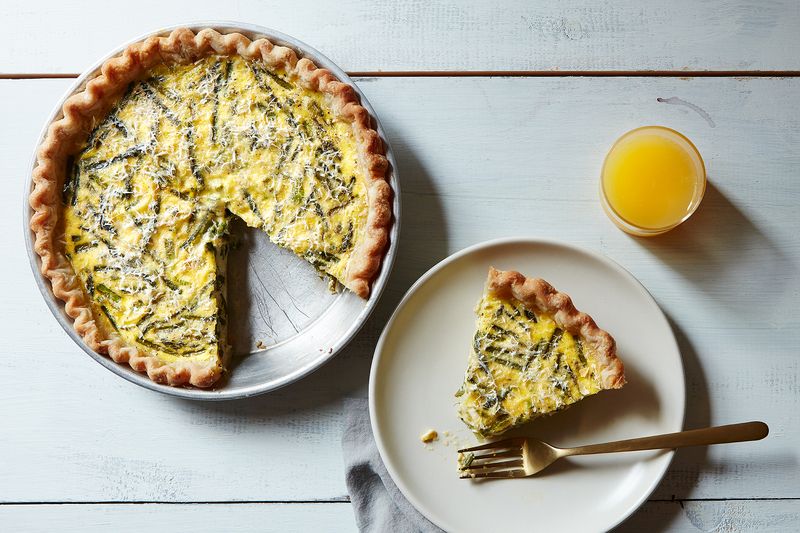
Photo by Mark Weinberg
So here’s to hoping this guide will forever change the way you say the word "quiche"—let it be the decadently rich savory pie of your dreams!

Asparagus, Leek, and Ricotta Quiche
- 1 recipe All Buttah Pie Crust (https://food52.com/recipes/24928-all-buttah-pie-dough)—mix the butter until it resembles roughly the size of peas
- egg wash, as needed
- 1 cup (not packed) grated Pecornio Romano, divided
- 1 bunch asparagus, trimmed and cut into 1-inch pieces
- 2 medium leeks, halved and thinly sliced
- 1/2 cup ricotta cheese
- 8 eggs
- 1 cup half and half
- salt and freshly ground black pepper, as needed
This article was written by Erin McDowell from Food52 and was legally licensed through the NewsCred publisher network. Please direct all licensing questions to legal@newscred.com.

")