Is there anything more alluring than a beguiling drip? You know what I’m talking about: the sweet glaze running down the edges of a yeast doughnut, the thick ganache falling down the sides of a perfectly frosted cake. Achieving the perfect drip consistency is not something recipes are great at describing, though. So sometimes you hit it out of the park, and other times you’re left with a gooey mess.
But you don’t have to leave it up to chance. There is a way to tell before you apply that drippy glaze if you’ve achieved perfection. After much glazing trial and error during the testing of my upcoming book, The Fearless Baker, I’m here to share the goods with you. Here’s what you need to know.
Types of Glazes: Non-Heated vs. Heated
A lot of glazes are made with a simple combination of powdered sugar and a liquid. This can be milk, cream, or fruit juice (or in the case of some recipes in my new book, reduced fruit puree, which makes naturally colorful glazes that look and taste amazing). The formula here is pretty simple: Keep adding more liquid until the glaze reaches the right consistency. If it gets too thin, add more powdered sugar to thicken. This kind of glaze is made at room temperature, and the consistency is simply adjusted with the ingredients (and can be adjusted as needed).
Other glazes are heated, though, and adjustments are a little different. Chocolate is a prime example. Glazes made with chocolate will thicken as they cool, which is important to remember when trying to achieve drips. If you let the glaze cool too much, it may not drip easily or naturally. If the glaze is too warm, you may not have control of the size or placement of the drips. My favorite thing to do with chocolate glazes (and other glazes that are heated) is to prepare the glaze as the recipe directs, then let it sit at room temperature until just it’s just warmer than room temperature before using it to glaze a dessert. Depending on the ingredients and amount of glaze, this could take anywhere from 15 minutes to 1 hour. It’s also important to remember that with glazes made over heat, temperature is the primary way to control the consistency after you mix the glaze. It’s more difficult to add a little of this or a little of that to thicken or thin the prepared glaze, so it becomes more about following the recipe, then practicing to get the right texture by playing with the temperature: warmer to make a more fluid glaze, and cooler to make a firmer glaze.
There are a few tricks to knowing when your glaze is drip-ready. Photo by Ren Fuller
Texture
There are three great textures for glazing, and what to use just depends on the look you’re going for.
Thin glaze: Thin glaze is slightly thicker than the texture of heavy cream, liquid and flowing. When you dip a spoon in the glaze, then lift it out, the glaze will run off the spoon in a thin, even stream. This glaze is best when you’re looking to achieve an even, almost all-over look. You can achieve drips, but they will be random and unpredictable, and likely fall all the way to the base of the dessert. My favorite ways to use thin glaze: on a doughnut, on the surface of an un-iced mini cake or cupcake, or over a rich dessert where you just want a hint of color/flavor in the form of a glaze (like maybe a cheesecake).
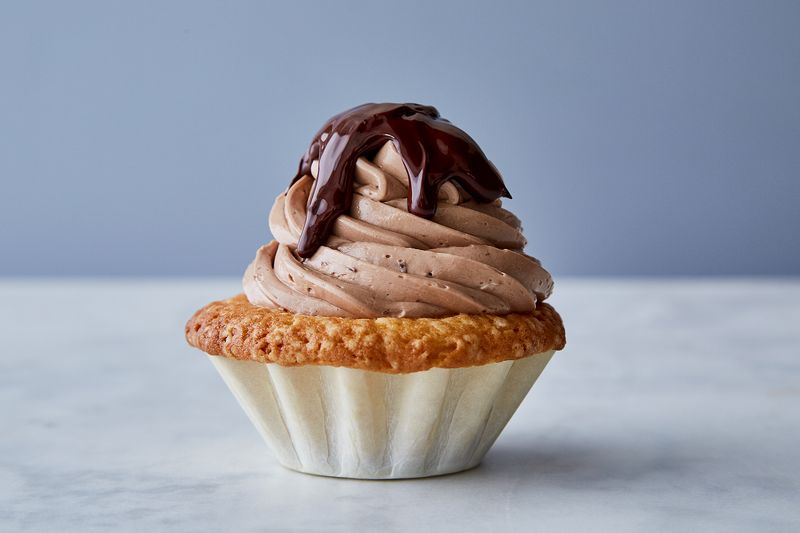
Guess my glaze consistency. Photo by Ren Fuller
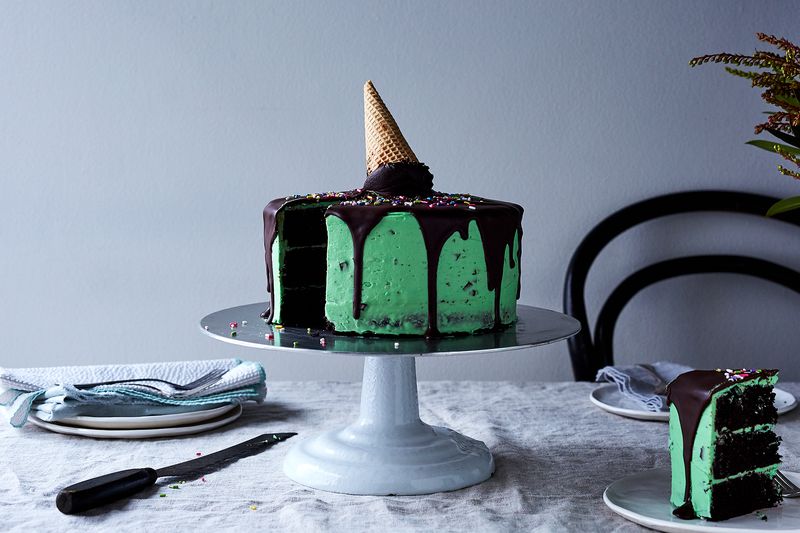
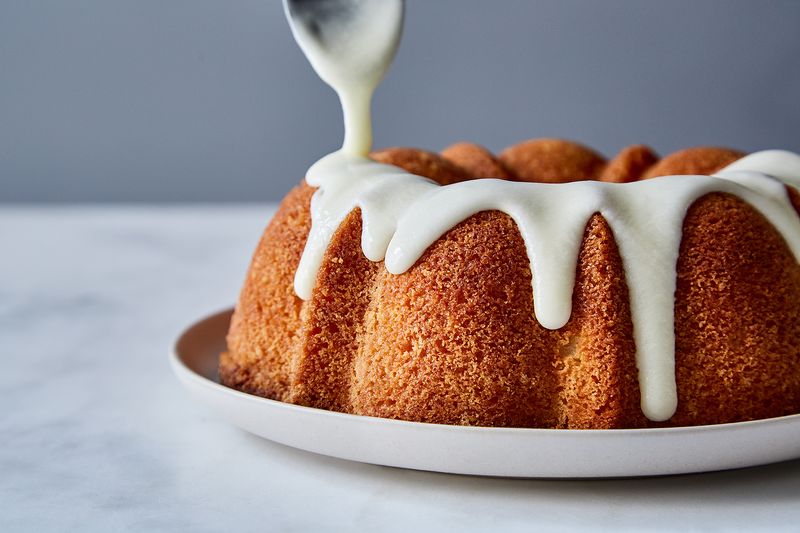
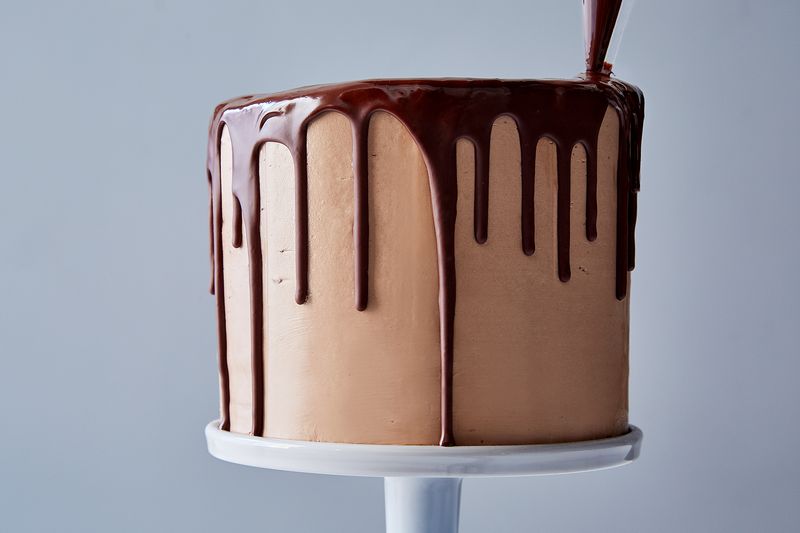
Medium Glaze: Medium glaze is close to the texture of softly whipped cream. When you dip a spoon in the glaze, then lift it out, the glaze will slowly (but immediately) fall off the spoon in a thick, ribbony stream. This glaze gives you the most natural looking drips by far (huge plus), but is still a little tricky to control, because it’s pretty fluid. This is my ideal drip texture, and I’ll use it for lots of things—drips down frosted layer cakes (even frosted cupcakes), or varied size drips cascading over the curves of a bundt cake.
Thick Glaze: Thick glaze is just a bit thinner than freshly made buttercream—when you dip a spoon into the glaze, then lift it out, the glaze will cling to the spoon, eventually (slowly) start falling off. Thick glaze is ideal when you want maximum control. The glaze is slow moving so you really have the power to place the drips exactly where you want them to be. I like to use thicker glaze for small glazed items, like cookies/sandwich cookies, and for drips down naked (filled but unfrosted) cakes. I find the firmer glaze looks more attractive with the unfinished sides.
Preparing the Dessert for Drip-ification
This sounds like a lot of work, but in most cases, it isn’t any at all! When you’re applying drips, it’s important to think about the item they’re being applied to before you add that final touch. The shape, consistency, and temperature of the finished product will impact your glaze. What does this mean? Think of a doughnut, which you likely want to serve fresh, possibly even warm. Applying a glaze to a warm doughnut means what? Well, even if you’re using a medium glaze, the heat of the pastry is likely to thin it out, making it run like a thin glaze. That’s ok, of course—if it’s what you’re going for. Similarly, I like to chill layer cakes before applying drips—but remember, a cold cake is going to make drips “set” more quickly—so you may want to start with a slightly looser glaze if you’re hoping for the drips to run fully down the sides. Basically, just take a moment and plan ahead; you’re more likely to achieve perfect drippage with a little preparation.
Applying the drips
One of the things I like most about drips is that they don’t need fancy tools or techniques to apply. There are several ways to go, though I’ve found that certain ways work better with certain textures of glaze.
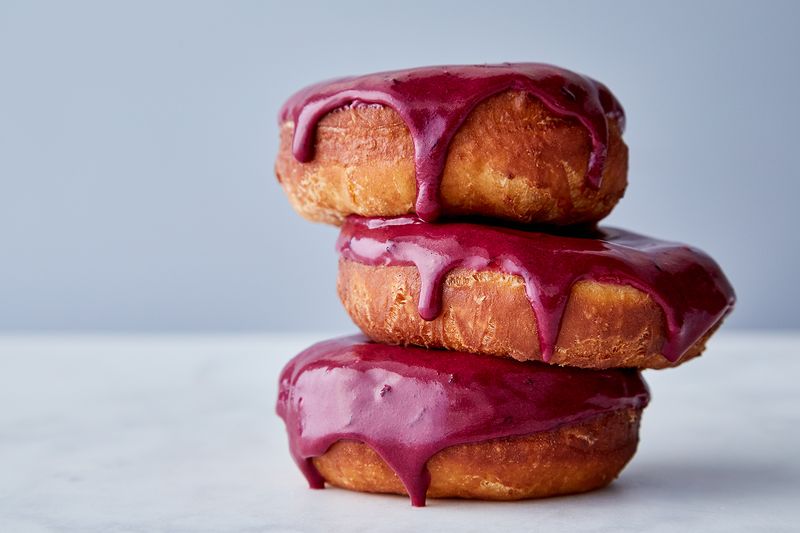
Dip to Drip: Dipping an item directly into the glaze is a great way to make super natural looking drips on smaller pastries. This works best with thin glaze, but can also work with a medium glaze if it’s a little bit on the thinner side. Remember, it has to be relatively fluid in order for it to be dip-able. Dip the pastry presentation-side down/directly into the glaze. Lift the item up and let some of the excess glaze fall back into the bowl, then invert the item onto a cooling rack and let the glaze naturally run off it (making dreamy drips in the process)! This works well with doughnuts, cookies, and cream puffs.
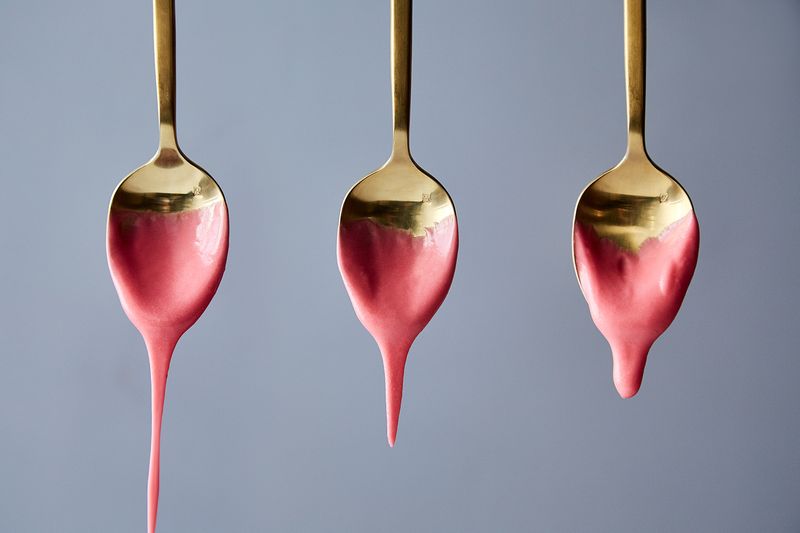
See the spoon nudging the glaze? Photo by Ren Fuller
Spoon: Spoons are my favorite tool for making drips. Truth be told, I’m actually kind of a spoon addict. I use them a lot when I’m styling food, and I’ve begun hoarding all different sizes and shapes. I like using a small spoons to apply drips to individual pastries, and medium spoons for larger items like cakes. I start by spooning a small amount of glaze just around the edge of the item, then use the bowl of the spoon to nudge it to the edge, allowing it to drip down the side. As you work your way around, you can encourage some drips to fall farther by using a little more glaze and heavier nudging to make the drips more random (for me, this is somehow strangely part of the allure). Once the whole edge is covered, spoon more glaze over the remaining surface of the pastry. Most glazes won’t set up right away. (Remember, temperature factors here; if your pastry is chilled, for example, it might make the glaze set more quickly than if the dessert is room temperature or warm!) The two portions will flood together naturally—the weight of the additional glaze will drag all the drips down a little further. If you notice your glaze is setting up more quickly, you can try warming it up gently so it’s more fluid while you work with it. But all of that is just the very careful way to do it. Alternatively, you can just spoon the glaze over the item and let the drips fall where they may. Guess what—this usually looks pretty damn great, too!
A piping bag works well here. Photo by Ren Fuller
Piping Bag: This is the fanciest way to make a drip, and also one of the fastest. I fill a disposable piping bag with the glaze. Remember not to fill any piping bag more than 3/4 of the way full; ideally, fill only halfway, it makes it easier to manage. Snip a small opening from the end (about 1/8–1/4 inch). I usually have a tall glass handy to store the pastry bag in when I’m not using it, since a thin glaze will want to fly right out. I just mush the tip of the bag directly down into the glass until I’m ready to go. Apply the glaze by piping a small amount of glaze just around the edge of the item, allowing glaze to flow out of the bag until it begins to drip down the side. As you work your way around, you can encourage some drips to fall farther by using a little more glaze to make the drips more random. Once the whole edge is covered, pipe more glaze in the center. If the glaze is at the ideal temperature, the glaze from the top will cleanly meet up with the drips from the side. If it’s setting up too fast, grab a small offset spatula or spoon and create swirls on the top, firming the glaze—this will look good with drips too! Alternatively, you can use a piping bag to apply glaze to the center of the cake and continue to pipe until the glaze begins to fall down the sides, then use the tip of the pastry bag to nudge the glaze to extend existing drips or make new ones.
A Tip for Your Drips
My secret weapon against misbehaving drips? A toothpick or skewer. Seriously, they’re the drip maker’s best bud. The pointed tip is perfect for guiding a drip to where you most want it to be—and doubles out to help smooth out any imperfections or glaze bubbles that form on the surface. If a drip goes rogue, a clean toothpick or skewer can help lift the drip away. If you wish a drip was a little different, dipping the toothpick/skewer in glaze provides just enough to add in drip alterations.
This article was written by Erin McDowell from Food52 and was legally licensed through the NewsCred publisher network. Please direct all licensing questions to legal@newscred.com.