Crunch Bars are an underrated candy bar. Because they’re so simple.
They’re often overlooked in favor of the caramel-peanut powerhouse that is the Snickers, the dynamic duo that comprises the Reeses, and wafer-y crunch of the Kit-Kat, amongst others. However, their simplicity makes them the (the!) easiest candy bar to make at home. No fanciness. No special tools. And, at their minimum, just two ingredients.
Once you get your Crunch Bar basics down, it’s easy to riff on them and make them your own—whether that be with bacon sprinkled on top or chile powder added in, for that little bit of oomph.
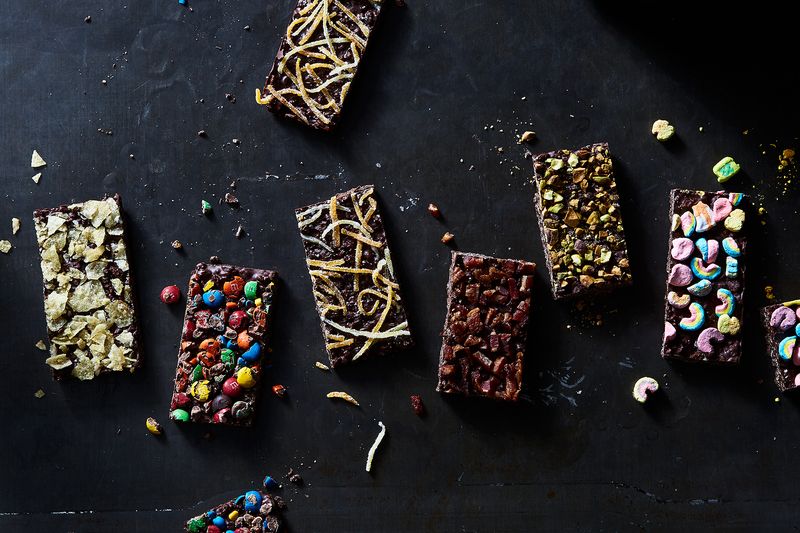
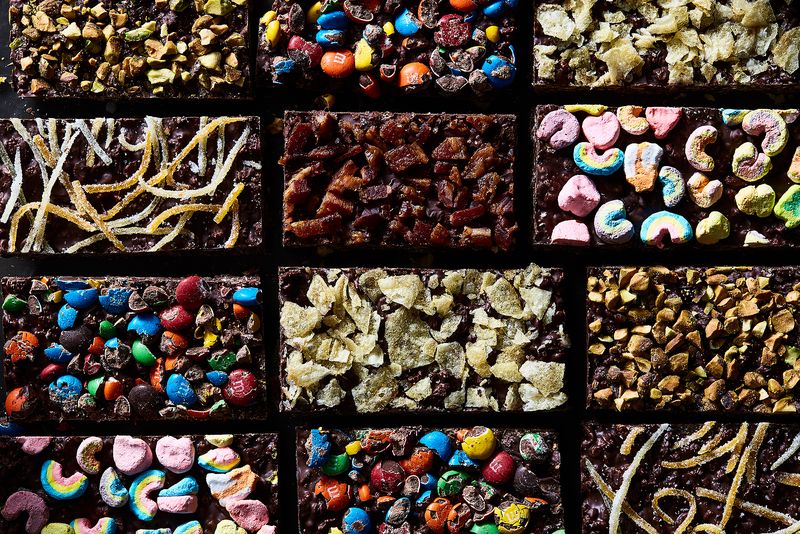
From left to right: potato chips, M&M's, candied citrus peel, bacon, pistachios, Lucky Charms Photo by Julia Gartland
The Basics
For a whole lot of candy—the number of bars will entirely depend on how big you cut them and the baking sheet you use, but more on that later—you’ll need:
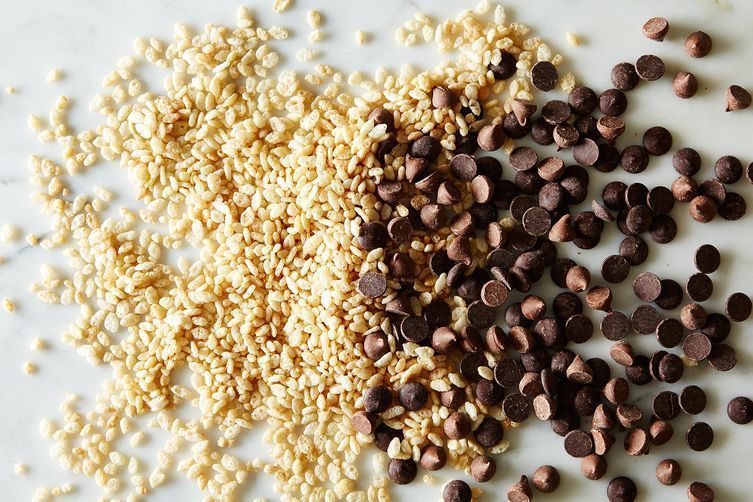
- 24 ounces chocolate chips, which is about 2 standard chocolate chips bags. You can use milk chocolate, dark chocolate, a mix of milk and dark chocolate, white chocolate, or white chocolate and dark or milk chocolate to make marbled bars (again, more on that later!)
- 3 cups Rice Krispies cereal
- Any add-ins/-ons you want—or don’t want!
A match made in heaven Photo by James Ransom
You’ll also need a few things equipment-wise, but nothing fancy:
- A baking pan (8x8 or 9x13 will work)
- Parchment paper
- A medium or large saucepan
- An aluminum mixing bowl that fits on top of the saucepan
- A couple of spatulas for mixing and spreading (if you have an offset spatula for the spreading bit, use it, but a standard one would work just fine)
Now, Let's Get Crazy
Add-ins/-ons are how you customize these Crunch Bars. Of course, if you want to go the pure chocolate-cereal route, that’s great, too. And as for add-in amounts, use as much or as little as you like.
Mix In:
- Cacao nibs.
- Toasted, chopped nuts (peanuts, almonds, walnuts, etc.)
- Spices, like curry powder, pumpkin spice, or chile powder. (Suggestion: If you’re going to use any spices, start with a little, taste, then add more. You can always add but you can’t...well, you know the adage.)
- Peppermint extract (just a dash will do ya!).
Sprinkle on Top:
- More rice krispies (duh)
- Flakey salt
- Rainbow sprinkles
- Freeze-dried fruit (you can crumble it slightly if needed)
- Cooked, crumbled bacon
- Classic or mini M&Ms
- Finely chopped or crumbled halvah
- Finely chopped caramel squares (yes, the kind you buy at the store)
- Other cereal, like Cocoa Krispies, Cinnamon Toast Crunch, Fruity Pebbles, or Golden Grahams
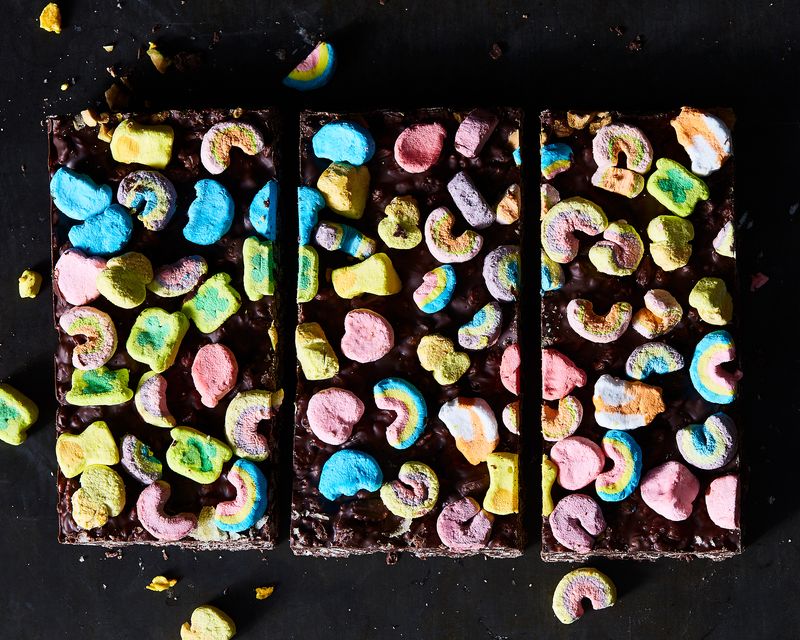
Instead of choosing between more cereal and marshmallows, we opted for just the charms in Lucky Charms. Photo by Julia Gartland
- Semi-crushed graham crackers
- Chopped pistachios or other nuts
- Mini marshmallows
- Semi-crushed mini pretzels
- Chocolate-covered espresso beans
- Granola
- Semi-crushed potato chips
- Poprocks
- Dried fruit, like cherries, raisins, or cranberries
- Candied citrus peels, ginger, or other fruits
Possible combinations:
- The S’mores: mini marshmallows + graham cracker (or Golden Grahams)
- The Trailblazer: dried fruit + granola
- The Unicorn: mini M&Ms + rainbow sprinkles
- The Breakfast-for-Dessert: bacon... just bacon
- The, Um, WHAT?!: potato chips + caramel squares
The Process
First things first: Line a baking pan with parchment paper. You can use an 8x8 pan for thicker bars or 9x13 pan for thinner bars.
Take a medium or large saucepan and fill it halfway or so with water. Place your mixing bowl on top of the saucepan. Is the water touching the bottom of the pan? If so, pour some out. You want there to be some space in between the bottom of the bowl and the water. Set your mixing bowl aside and place the saucepan on medium to medium-low heat and let it come to a simmer.
If this saucepan-mixing bowl business sounds familiar, it’s because we’re making a double boiler (not to be confused with the fancier-sounding bain-marie). A double boiler allows the chocolate to heat gently, without the danger of hot spots or burning that you would have if you melted it directly in a saucepan (which you can do, just be careful) or even in the microwave (which you can also do by putting the chocolate in a microwave-safe bowl and heating it in 30-second intervals, stirring in between, until the chocolate is fully melted).
Once the water is simmering and producing a good amount of steam, place your mixing bowl back on top of the saucepan. Then, pour your chocolate chips into the mixing bowl. It’ll take a minute or so for the chocolate to start melting, but once it does, you’re going to want to stir it with a spatula rather constantly until the chocolate is fully melted. All melted? Pour in the Rice Krispies and stir! Once the chocolate and cereal are evenly incorporated, transfer to the mixture to a baking dish.
Add-Ins
Once the Rice Krispies are incorporated, now’s the time to mix in any add-ins of your choosing. Then, remove the bowl from the saucepan (you might want to wear an oven mitt for this or grab a dish towel if the bowl’s hot), and use your spatula to pour the chocolate into the baking dish. If you have an offset spatula, now’s the time to switch spatulas and spread the chocolate in an even layer in the baking dish. If not, just carry on spreading.
Remember those marbled bars we mentioned at the beginning? Here’s how to make them: Use 12 ounces white chocolate chips, 12 ounces milk or dark chocolate chips, and half the amount (1 1/2 cups) of Rice Krispies and add-ins for each chocolate mixture. Start with the white chocolate chips, and follow the same procedure as above. Instead of pouring the whole thing into the baking pan, grab a large spoon and dollop the chocolate-cereal mixture in random spots around the pan—5 or 6 large dollops will do. Then, take a second similarly-sized mixing bowl (or just wash the one you used) and follow the same steps for melting the milk or dark chocolate chips and adding the cereal and add-ins. Again, grab a large spoon and dollop the mixture any spaces devoid of the white chocolate. Take a spatula and gently spread the chocolate to the sides and middle of the pan, creating an even layer as best you can. Take a fork or knife and swirl it through the white and milk/dark chocolate all over, creating a marbled effect. Proceed with the instructions below.
You can easily make this, and give them as gifts, too. Photo by Julia Gartland
Add-Ons
Sprinkle the chocolate with your add-ons. If you’re using ones that are bigger and more bulbous like mini marshmallows, cereal, or M&Ms, it’s not a bad idea to use a clean spatula and very gently press the toppings into the chocolate. Due to their shape and size, these sorts of toppings or more liable to fall off when you’re cutting the bars, lest they are firmly secured in the chocolate.
Pop the baking dish into the fridge or freezer to firm up. Once the chocolate is completely cool, lift the parchment paper up and onto a cutting board, and slice it into bars. You can wrap the bars individually in aluminum foil for more of a candy bar feel. Store in the freezer or fridge to eat all month or year long (or just, you know, once or twice a day). And since we’re approaching peak gift-giving season, homemade Crunch Bars also make great presents for anyone you really like, love, or want to win over.
This article was written by Riddley Gemperlein-Schirm from Food52 and was legally licensed through the NewsCred publisher network. Please direct all licensing questions to legal@newscred.com.